Repointing can be a simple job, but it’s important to do it carefully with the right tools and materials. If you don’t use enough mortar or don’t clean the bricks well enough before repointing, your work will not last as long as it should. The mortar joints in brick walls are vulnerable to damage from weather and deterioration, so it’s important to check them periodically and repoint the affected areas, a process called repointing. There are several ways to do this. The simplest method is to use a pointed trowel to push out the old mortar and then fill the void with new mortar.
You can also use a mason’s chisel, or if you’re repointing a lot of bricks at once, you might want to consider using a power-driven hammer drill to remove the old mortar. Just make sure you choose an appropriate replacement material; some modern mortars may permanently damage the bricks they bond with.
Is it possible to mortar over old mortar?
Bricks that are 50 years old or less may be repointed safely with modern portland cement–based mortar. However, older bricks may have been mortared using lime putty and sand, so you should try to match that composition when repointing. Without regular maintenance, over time, the soft old brick will swell in reaction to moisture and shrink as it loses moisture.
These movements will cause the mortar joints to break, trapping moisture in the wall. Traditional lime mortar acts like a cushion and allows for this movement, keeping joints from breaking and moisture from being trapped in the wall.
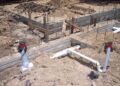
Clean out the bed joints
To remove mortar from between the bricks, scrape the joints with a stiff-bristle brush to a depth of ¾ inch. A carbide-tipped grout saw is ideal for removing the mortar from butter joints less than ½ inch wide; for wider joints use a cold chisel and an engineer’s hammer. Avoid electric angle grinders because they will cut into and disfigure the brick if used by an unskilled person.
Clean out the flue pipes
Once you’ve removed several courses of bed-joint mortar, chisel out the vertical joints. Be careful not to damage the bricks above or below.
Wash the walls
Wipe away the loose mortar and clear away all debris. Then, see if your tuck-pointing trowel will fit into the joints. If it’s too wide, grind it down with an abrasive wheel. Mist the wall with water until it is thoroughly damp and starts to drip; this step is critical because dry materials will suck the moisture out of the new mortar and prevent it from curing properly. Wait until tomorrow before filling the joints.
Add the mortar
Moisten the brick. Then, following the directions on the bag, stir water into the dry mix until it resembles peanut butter and sticks to an upended trowel. Wait about 15 minutes for a film of water to form in the mortar. Stir that water back into the mixture. The mortar is now ready to use and remains workable for 8 hours if kept moist; if it dries out completely, you can “retemper” it occasionally by adding water.
Fill in the cracks
Fill mortar joints by scooping mortar onto a trowel, holding the trowel even with the bed joint, and pushing the mortar against the back of the joint with the trowel’s edge. Remove voids by making several slicing passes with the trowel’s edge, then add more mortar until you’ve filled three or four courses of bed joints. Next, fill head joints followed by smoothing and compaction of all mortar.
Wipe the wall
To clean mortar from joints after applying new mortar, first wait until the mortar is dry enough to be firm but still flexible. Then use a soft brush to brush diagonally across the joints to remove any dry mortar crumbs. Brushing in line with the joints can pull out the fresh mortar.
Next, sponge away excess mortar with a damp sponge, being careful not to disturb the brick faces. Protect the wall from the sun, wind, or hard rain for three days by covering it with a tarp, and misting it daily in order to keep it moist.
Also read: DIY Tips for Roofing and When You Should Hire a Professional